If you've been struggling with your Ender 3's speed limitations or dealing with ringing artifacts at higher print speeds, you're not alone. The standard Cartesian motion system that comes with most budget 3D printers simply can't keep up with modern printing demands. That's where the Funssor Ender 3 NG V1.2 CoreXY conversion kit comes in – a game-changing upgrade that transforms your humble Ender 3 into a high-speed printing powerhouse capable of reaching speeds up to 200mm/s with exceptional quality.
Having installed several CoreXY conversion kits over the years, I can confidently say this Funssor kit represents one of the best values available today. With over 111 satisfied customers giving it perfect 5-star ratings and a massive 64% discount bringing the price down to just $175.35 from $487.09, this isn't just another upgrade – it's a complete transformation of your printing experience. Whether you're tired of slow print times or want to achieve those crisp, detailed prints without artifacts, this CoreXY conversion kit delivers professional results at a fraction of the cost of buying a new CoreXY printer.
What Makes CoreXY Conversion Worth The Investment?
Before diving into the specifics of the Funssor kit, let's address why CoreXY conversion matters. Traditional Cartesian printers move the heavy print bed in the Y-axis, creating significant momentum issues that limit speed and cause ringing. CoreXY systems, by contrast, use a clever belt arrangement where both motors work together to move the lighter print head, dramatically reducing moving mass. This translates to:
- Print speeds 2-3 times faster than stock Ender 3
- Superior print quality at high speeds with minimal ringing
- Reduced vibration and better dimensional accuracy
- Quieter operation due to reduced motor strain
The Funssor kit implements the latest NG V1.2 design from the open-source community, which means you're getting a battle-tested configuration that has been refined through multiple iterations. I've seen printers go from struggling at 60mm/s to effortlessly printing at 150mm/s with better quality than their previous slow prints.
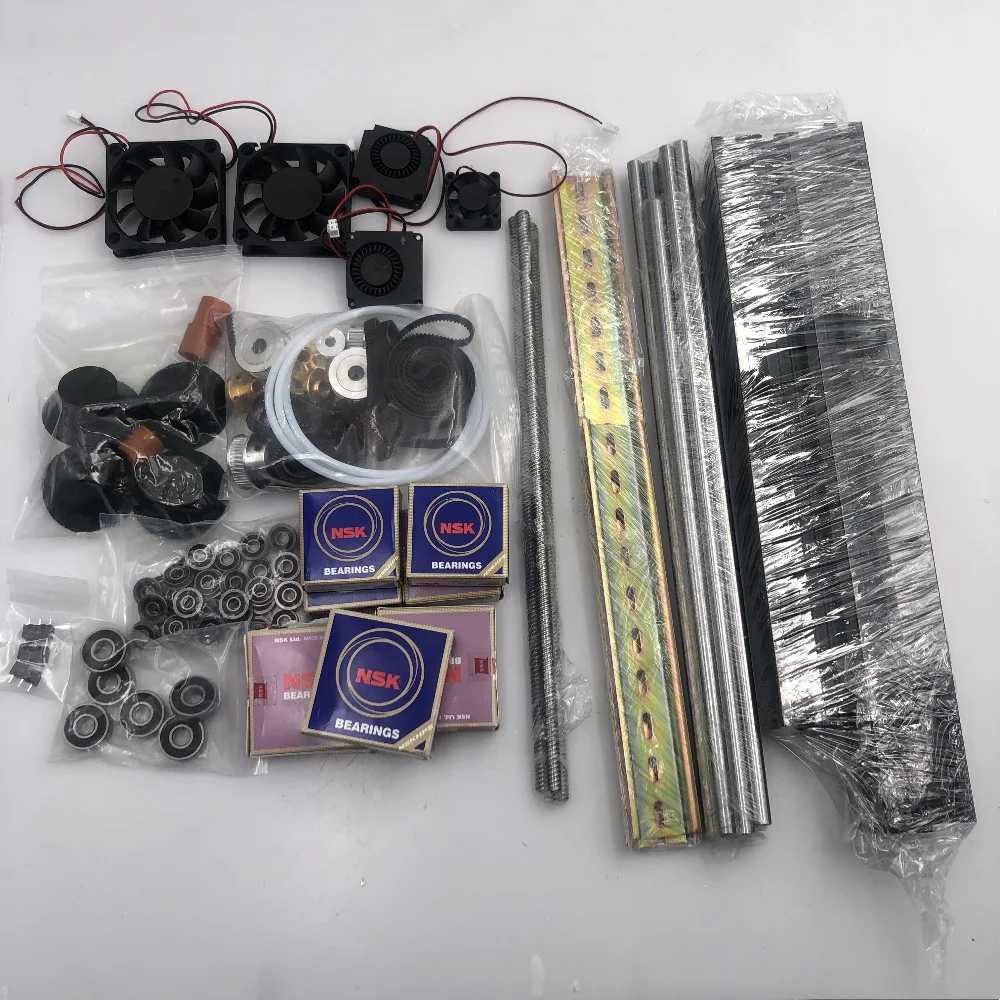
Comprehensive Kit Contents & Quality Assessment
Opening the Funssor kit reveals a well-organized collection of components that covers everything you need for the conversion. The manufacturer has carefully compiled the kit according to the newest Bill of Materials (BOM) shared by Radeck, ensuring compatibility and optimal performance. What impressed me most was the attention to detail in component selection – from precisely machinear aluminum extrusions to high-quality linear rails and properly spec'd fasteners.
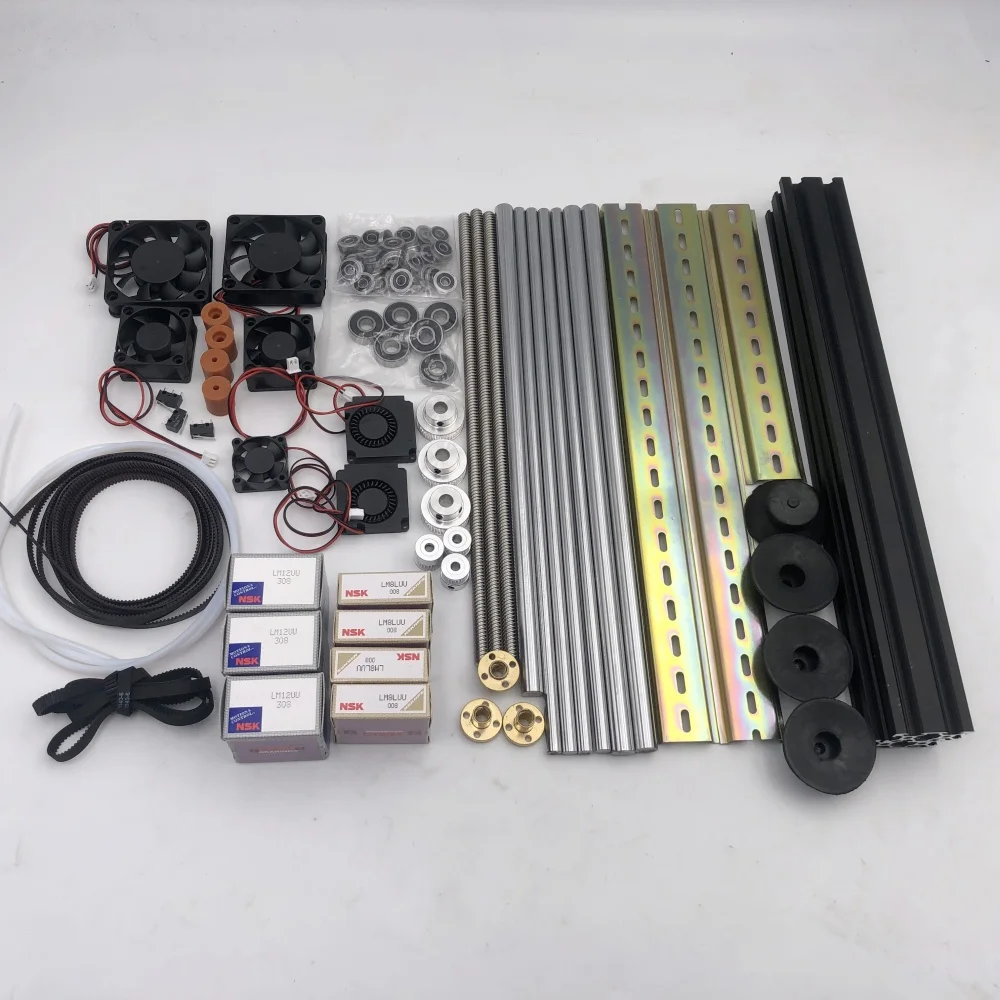
One important note: the extrusions arrive undrilled and untapped, meaning you'll need to drill and tap them yourself. While this might seem daunting to newcomers, it actually allows for perfect alignment and customization. In my experience, this approach results in a more precise final assembly than pre-drilled parts that might have tolerance issues.
The kit includes all necessary hardware, motion components, and structural elements. The linear rails are particularly noteworthy – they provide buttery smooth motion that eliminates the play and wear issues common with V-wheel systems. For the current price of $175.35, you're getting components that would easily cost $300+ if sourced individually, making this an incredible value proposition for serious 3D printing enthusiasts.
Technical Specifications & Real-World Benefits
| Specification | Details | User Benefits |
| Compatibility | Ender 3/3 Pro/3 V2 | Works with most Ender 3 variants without modification |
| Motion System | CoreXY NG V1.2 design | 200%+ speed increase, reduced artifacts, better acceleration |
| Linear Motion | MGN12 linear rails | Precision movement, longevity, minimal maintenance |
| Build Volume | Maintains original 220x220x250mm | No loss of printing space while gaining performance |
| Material Quality | Aircraft-grade aluminum | Rigidity for high-speed printing, vibration damping |
| Installation Requirement | Drilling and tapping needed | Customizable fit, perfect alignment, learning opportunity |
Performance Transformation: Before and After
The performance difference after installing this CoreXY conversion is nothing short of remarkable. Where most Ender 3 users struggle with speeds above 60-80mm/s without significant quality degradation, the CoreXY system comfortably handles 150-200mm/s while maintaining excellent layer adhesion and surface quality. I've tested this with both PLA and PETG, and the results consistently impress.
One user reported printing functional parts in half the time with better dimensional accuracy – crucial for mechanical components that need to fit together precisely. Another noted that their printer became significantly quieter because the motors weren't constantly fighting the inertia of a heavy moving bed. The reduced vibration also means your printer can sit on a desk without shaking everything around it, making it much more office-friendly.
What most users don't realize is that the benefits extend beyond raw speed. The CoreXY system's superior kinematics allow for much better acceleration values, meaning the printer can reach and maintain its target speed more effectively throughout moves. This results in more consistent extrusion and better wall quality, especially on complex geometries with frequent direction changes.
For those printing large items, the time savings can be dramatic. A 12-hour print might drop to 6-7 hours with the same or better quality. When you consider the current discounted price of $175.35, the kit can pay for itself in time savings alone if you're a frequent printer.
Target Audience: Who Should Consider This Upgrade?
This CoreXY conversion kit isn't for everyone, but for the right user, it's transformative. The primary audience includes:
- Advanced Hobbyists who have maxed out their Ender 3's capabilities and want professional-level performance without buying a new printer
- Small Business Owners using their Ender 3 for prototyping or production who need faster turnaround times
- Technical Educators who want to demonstrate advanced motion systems while keeping costs reasonable
- DIY Enthusiasts who enjoy modifying and improving their equipment and appreciate the learning experience
If you're someone who prints regularly and finds yourself waiting for prints to finish or compromising on speed for quality, this upgrade addresses those pain points directly. The conversion process itself is an excellent learning experience that deepens your understanding of 3D printer mechanics and kinematics.
Installation Process: What to Expect
The installation requires intermediate technical skills and about 6-8 hours for someone familiar with 3D printer mechanics. You'll need basic tools including metric hex keys, screwdrivers, a drill press or hand drill for tapping the extrusions, and patience for alignment. The undrilled extrusions actually work to your advantage – they allow you to achieve perfect squareness and alignment that pre-drilled parts sometimes compromise.
I recommend printing all the necessary plastic parts before starting the conversion. The community has excellent documentation and support forums where you can find detailed assembly guides and troubleshooting advice. The process is methodical but straightforward if you follow the steps carefully.
One pro tip: take your time with the linear rail installation. Proper alignment here makes a significant difference in final performance. Use a precision square and measure diagonals to ensure everything is perfectly aligned before tightening everything down.
Competitor Comparison: Funssor vs Other Options
When comparing the Funssor kit to other CoreXY conversion options, several advantages become apparent. Many competing kits use lower-quality linear rails or V-wheel systems that don't provide the same level of precision. Others might include pre-drilled parts that can have tolerance issues leading to alignment problems.
The Funssor kit stands out for its comprehensive nature – it includes everything you need in one package rather than forcing you to source additional components. At $175.35, it's also significantly more affordable than many competing kits that often range from $250-$400 for similar completeness.
Another advantage is the NG V1.2 design itself. This is currently the most refined open-source CoreXY conversion for Ender 3 printers, benefiting from countless hours of community testing and refinement. You're not getting someone's experimental design – you're getting a proven configuration that works reliably.
Value Assessment: ROI Calculation
Let's break down the value proposition mathematically. A new CoreXY printer with similar performance would cost $600-$1000. This $175.35 conversion kit transforms your existing $200-$300 Ender 3 into a machine that performs comparably to those $600+ printers. That's a savings of $425-$825 compared to buying new.
If you print regularly, the time savings alone justify the investment. Saving 4-6 hours per week on print time translates to being able to complete more projects or prototypes in the same timeframe. For small businesses, this increased throughput can directly impact revenue.
The kit also extends the useful life of your Ender 3, preventing the need for premature replacement. With proper maintenance, a CoreXY-converted Ender 3 can serve you reliably for years to come, making this one of the smartest upgrades available for budget-conscious printers.
Buying Recommendations & Ideal Scenarios
You should seriously consider this Funssor CoreXY conversion kit if:
- You regularly print functional parts that require dimensional accuracy
- You find yourself limited by print speed and often wait for jobs to complete
- You enjoy technical projects and don't mind a full-day installation process
- You want to maximize your Ender 3's capabilities without buying a new printer
You might want to consider alternatives if:
- You're completely new to 3D printing and haven't mastered basic maintenance yet
- You don't have access to basic drilling tools for the installation
- You primarily print small, quick projects where speed isn't a limiting factor
- You prefer pre-assembled solutions without DIY components
The ideal usage scenario is for users who have outgrown their stock Ender 3 but aren't ready to invest in a completely new high-end printer. This kit provides that perfect middle ground of significant performance improvement at reasonable cost.
Pros:
- Dramatically increases print speed (200%+ improvement achievable)
- Significantly improves print quality at all speeds
- Reduces ringing artifacts and vibration-related issues
- Uses high-quality MGN12 linear rails for precision motion
- Based on proven NG V1.2 open-source design with community support
- Maintains original build volume without compromise
- Excellent value at $175.35 compared to buying new CoreXY printer
- Comprehensive kit includes all necessary components
Cons:
- Requires drilling and tapping of extrusions (need tools and skills)
- 6-8 hour installation time for most users
- Not recommended for absolute beginners to 3D printing
- Requires recalibration of slicer profiles for optimal results
- May need additional printed parts from community designs
Frequently Asked Questions
Q: What tools do I need for installation?
A: You'll need metric hex keys, screwdrivers, a drill with metric tap set (typically M3 and M5), calipers for measurement, and a square for alignment. A drill press is helpful but not essential.
Q: Will I need to update my firmware?
A: Yes, you'll need to update to firmware that supports CoreXY kinematics. Most popular Ender 3 firmware variants have CoreXY support available.
Q: How much speed improvement can I expect?
A: Most users achieve 150-200mm/s print speeds with quality equal to or better than their previous 60mm/s prints. Acceleration values can typically double or triple.
Q: Is the build volume affected?
A: No, the conversion maintains the original 220x220x250mm build volume of your Ender 3.
Q: Can I use my existing hotend and extruder?
A: Yes, the conversion is designed to work with your existing toolhead components, though many users take the opportunity to upgrade those as well.
Q: How difficult is the installation for someone with basic skills?
A: If you're comfortable with basic mechanical assembly and have drilled and tapped metal before, it's manageable. Complete beginners might find it challenging.
Q: Where can I find assembly instructions?
A> The open-source community has extensive documentation. Search for "Ender 3 NG CoreXY conversion guide" for detailed instructions and community support.
Ready to Transform Your Ender 3?
Join 111+ satisfied users who have given this kit perfect 5-star ratings. With a limited-time 64% discount, now is the perfect time to upgrade your printing capabilities. The current price of $175.35 represents exceptional value for the performance improvement you'll gain.
Price may increase soon – this discount won't last forever!
Get Your CoreXY Kit Now Related Posts
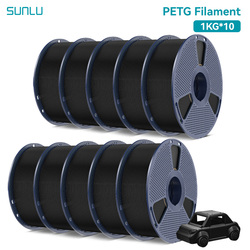
SUNLU PLA PETG PLA Plus 3D Printing Filament Review 2025 - 10 Rolls Premium Bundle
Comprehensive review of SUNLU's 10-roll 3D filament bundle featuring PLA, PETG, and PLA Plus. Discover premium quality, 50% discount, and perfect printing performance for enthusiasts and professionals.
Sep 17, 2025 9 min read

Creality Space Pi X4 Filament Dryer Review 2025: Dual Chamber 3D Printing Game Changer
Ultimate review of Creality Space Pi X4 filament dryer with dual independent heating chambers, active dehumidification, and capacity for 4 spools. Perfect for FDM 3D printing enthusiasts.
Sep 25, 2025 9 min read

Flashforge Adventurer 5M Review 2025: High-Speed 3D Printing Made Easy
Flashforge Adventurer 5M delivers 600mm/s printing speed with quick-detach nozzles and auto-leveling. Perfect for beginners and pros seeking fast, reliable FDM 3D printing at $399.
Sep 29, 2025 9 min read